I am not a jewellery person but you might be forgiven to display some disbelief. I was looking for a certain pair of earrings the other night (one of these rare nights when I was able to persuade Mr Make! to come to a function with me) and opened my little box of treasures. Everything was tangled up and it took me ages to find the matching earrings.
Being fed up with something is the best motivation to change things. And the fact that I remembered that I had some old (and I mean old) frames lying around. I went to an auction once (since then I am not allowed to attend any auctions anymore as I don’t seem to have any self-control) where I saw the old frames offered as a lot and I thought €50 is a bargain (husband didn’t think so).
But said husband comes in quite handy sometimes as his van and shed can be a treasure throve. He happened to have chickenwire and all I needed was a bit of patience.
This is my first jewellery frame and I have learned a lot from it (in case I get another notion). First, I would have added all frills before I attached the chickenwire – makes life so much easier.
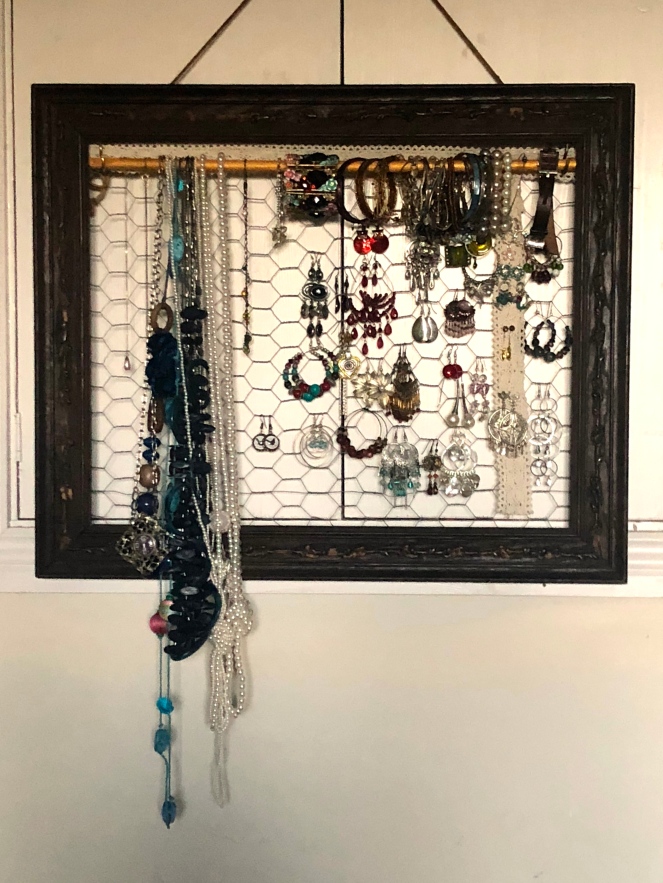
Anyways, here is te result (and I noticed that I have much more jewellery than I thought I had (and a lot has already been sorted out and brought to the charity shop). It is all costume jewellery and things I found at craft markets etc.
When I took the frame and turned it around (I haven’t touched the box of frames since I bought it) and found this amazing label – I made sure that I didn’t take it off when I cleaned the frame. I tried to do a quick research into the business but came up empty – might do it more seriously later.

I could have painted the frame but I love wood as it is (saying that, some upcycle I have seen were awesome) and I wanted to preserve the details on the frame. They were quite loose in some places and completely missing in others. I carefully glued the pieces back into their rightful place and cleaned carefully. I haven’t waxed it yet but it’s in the planning.

Next, I stapled the chickenwire to the back of the frame – and here is the mistake, I should have added the wire last after I added the rod for the bracelets and the cotton lace for the stud earrings (also, I will be adding a second rod in a few days for the rings).
I am not showing you the back of the frame with my sorrow attempt to staple – I have an electric stapler but for some reason it decided not to cooperate and the staples were half hanging out so I had to hammer them down.

Next I attached the cotton lace on top of the frame (again, I should have started with the rod). After I attached the rod (with two srew-in hooks), I didn’t have enough space on the top, so I attached a second ribbon of cotton lace.

Now it was just a matter of sorting through my assortment of jewellery (and I should really stop calling it jewellery as it has no financial value whatsoever).
Enjoy xx